一家烤肉萬家香,一家著火...:RxJS - Subject
前言
在 每個醫師身邊都應該要有個白衣天使:RxJS 最後只簡單的說明 Subject 與 Observable 最大差別就是允許多個觀察者(Observer)訂閱(subscribe),今天就來做一個比較有感的範例。
Angular Material
Angular Material 是 Google 專為 Angular 打造的視覺化元件,隨著 Angular 6 的發佈不只整合度更高,安裝與設定上也更加方便。
首先我們透過 Angular CLI 指令 ng new demo-rx-subject 快速幫我們建立一個名為 demo-rx-subject 的專案。
接著透過指令 ng add @angular/material 來安裝 Angular Material。
我們可以看到它異動了5的檔案:
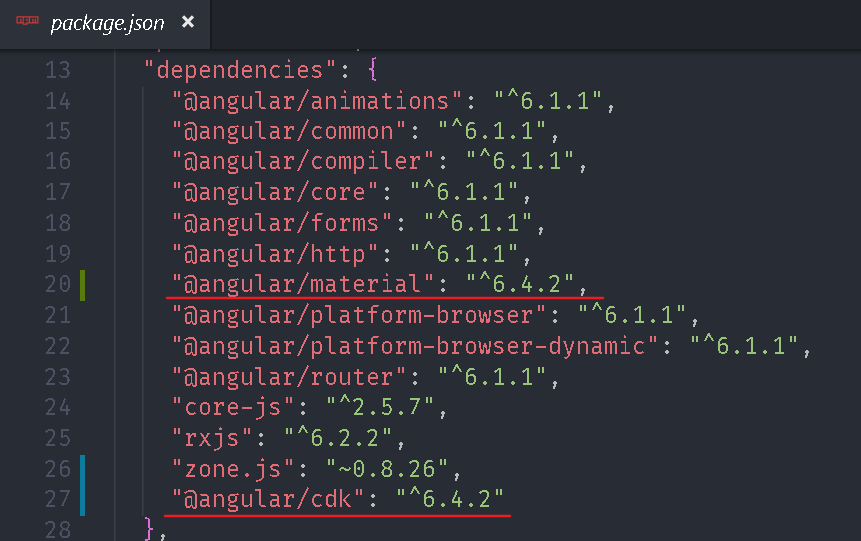
package.json:增加了
@angular/material、@angular/cdk2個 package。
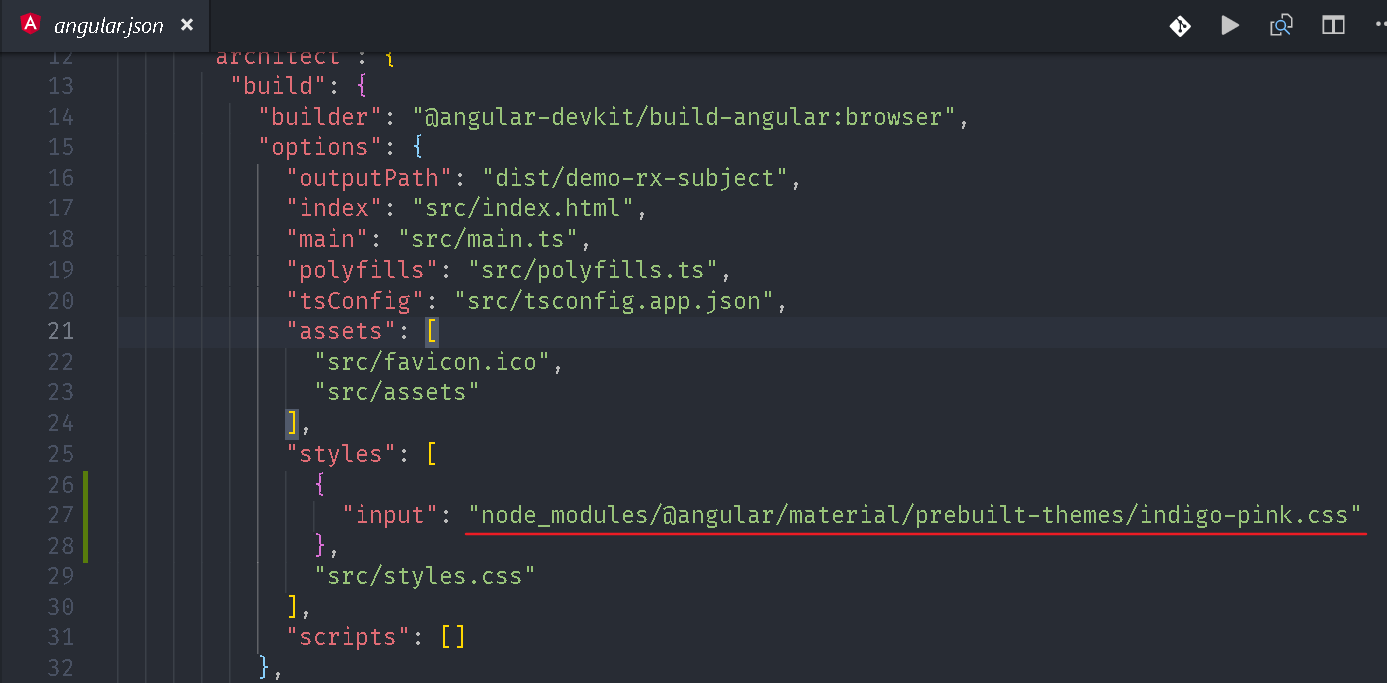
angular.json:幫我們套用
indigo-pink.css樣式。
Angular Material 總共有4種樣式:
deeppurple-amber.css、indigo-pink.css、pink-bluegrey.css、indigo-pink.css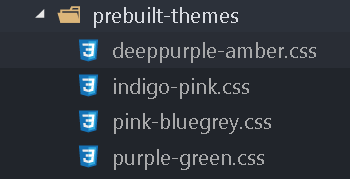
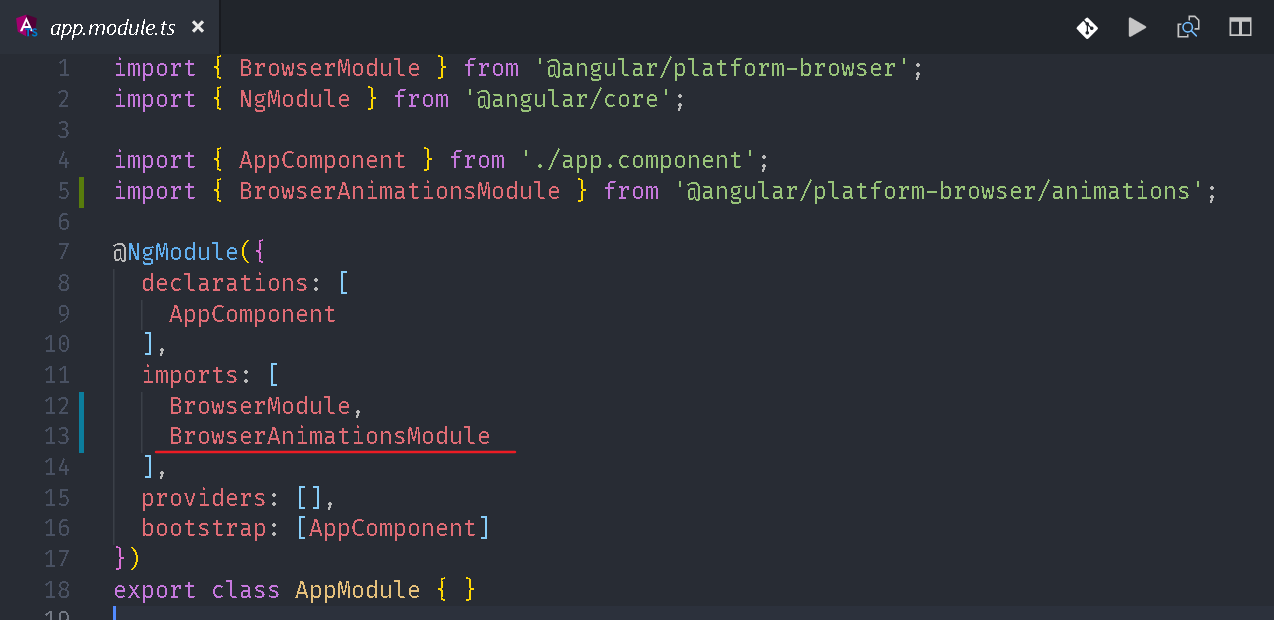
src/app/app.module.ts:加入動畫模組 BrowserAnimationsModule,Angular 6 專案建置時雖然會安裝此模組,但是預設不會套用。
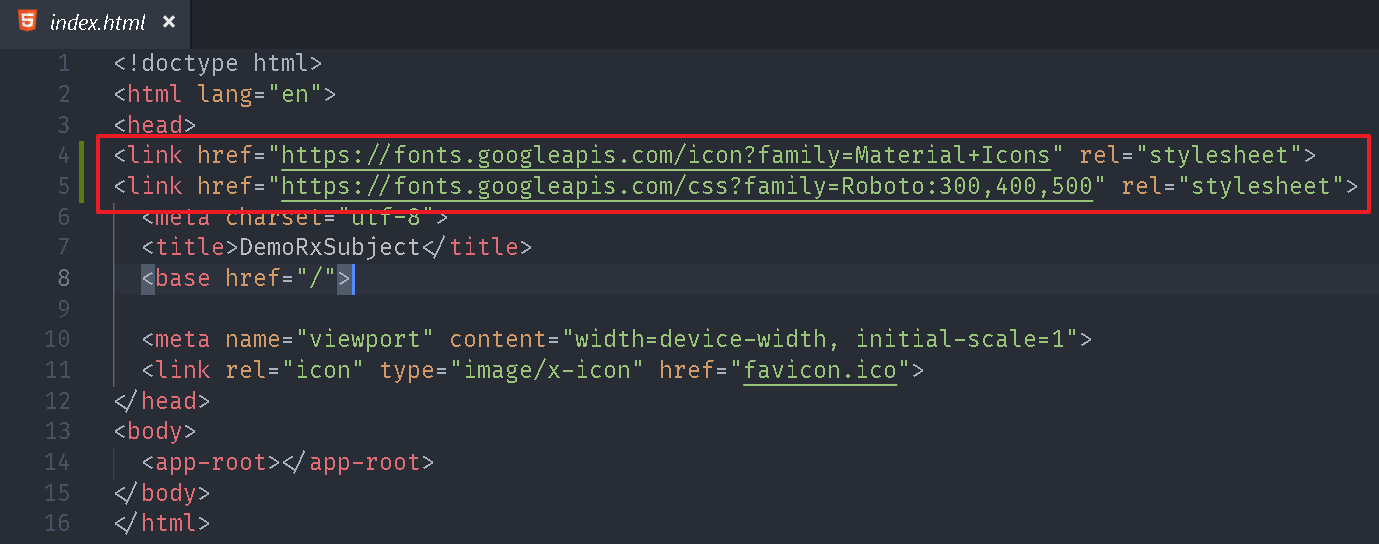
src/index.html:加入 Material Icons 與 Roboto 字型。
src/styles.css:套用輕量型的 CSS Reset 與加入 Roboto 字型。

參考資料:CSS Tools: Reset CSS
沒錯,過去需要自己設定的步驟,現在一行指令就完成。
Angular Material 第6版除了提供 Material Design 風格的元件之外,目前還提供 3個幾本版型:Navigation、Dashboard、Table,我們分別可以透過下列指令來建立:
Navigation:ng generate @angular/material:material-nav --name <component-name>
Dashboard:ng generate @angular/material:material-dashboard --name <component-name>
Table:ng generate @angular/material:material-table --name <component-name>
我們直接透過指令 ng generate @angular/material:material-nav --name nav 來建立一個選擇器名稱為 app-nav 的 NavComponent。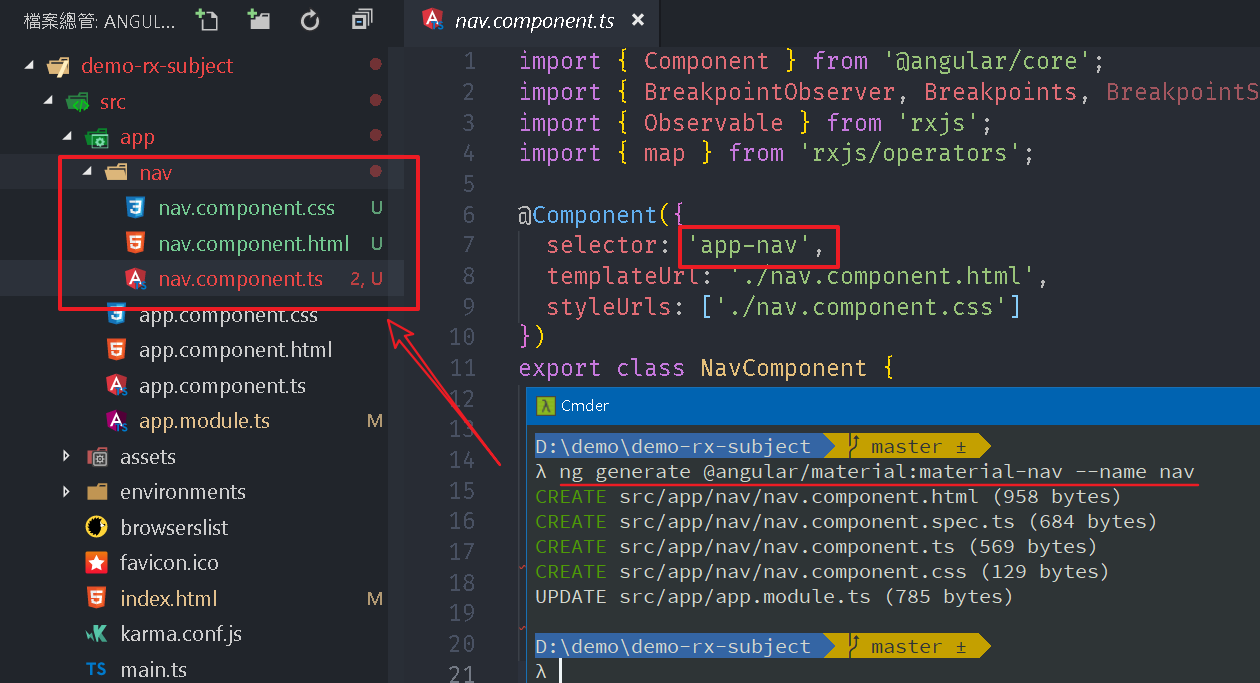
接著我們將 src\app\app.component.html 內容移除並加入 NavComponent,讓整個頁面只呈現這個元件。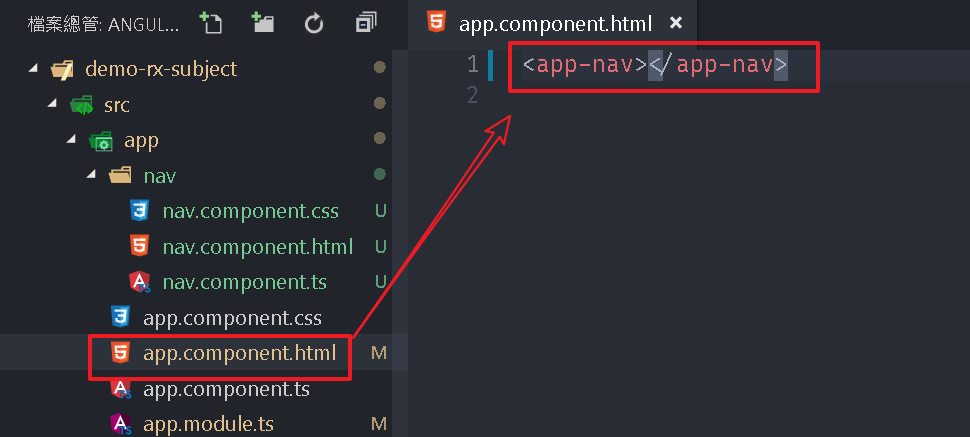
最後再透過 cli 指令 ng serve 來啟動,並透過瀏覽器開啟 http://localhost:4200/ ,便可看到一個現在很常見的導覽式框架。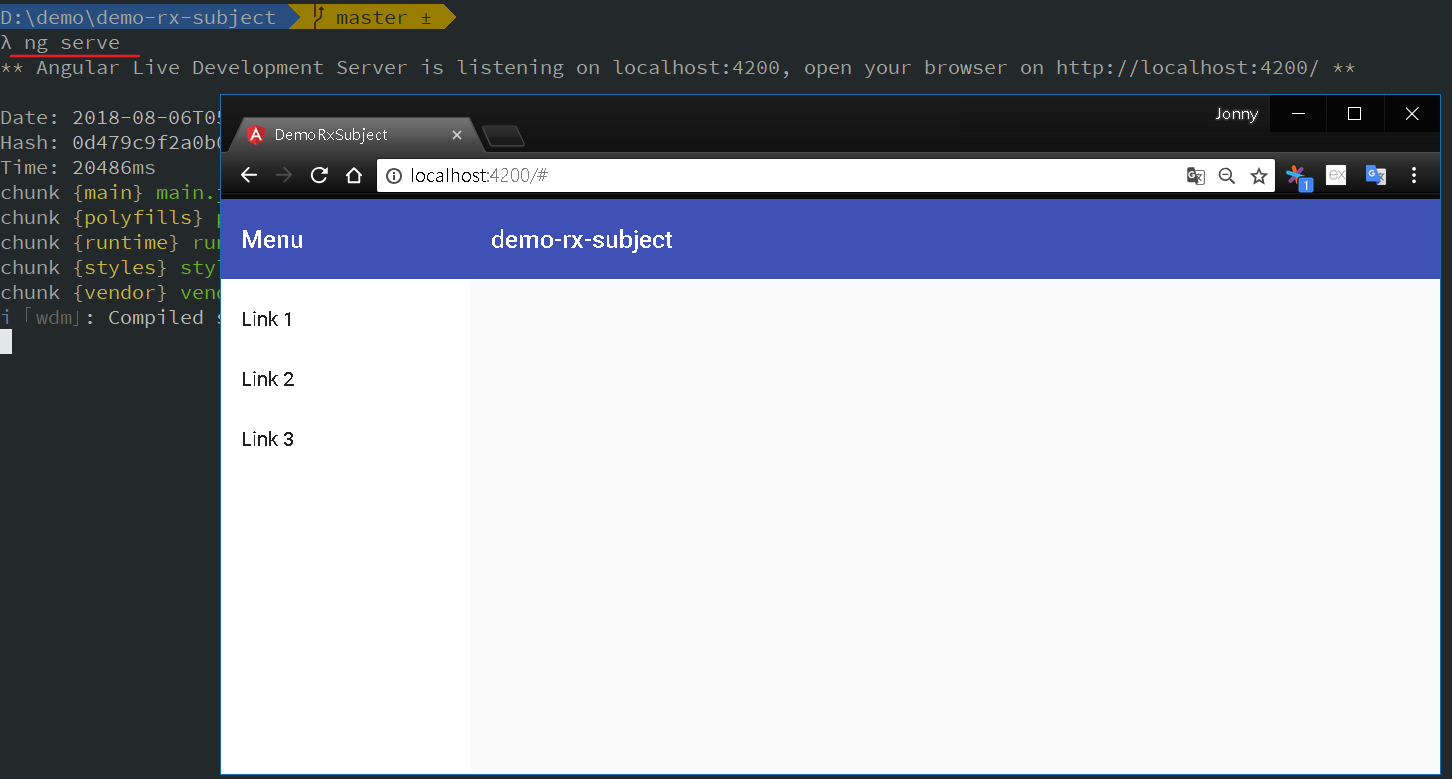
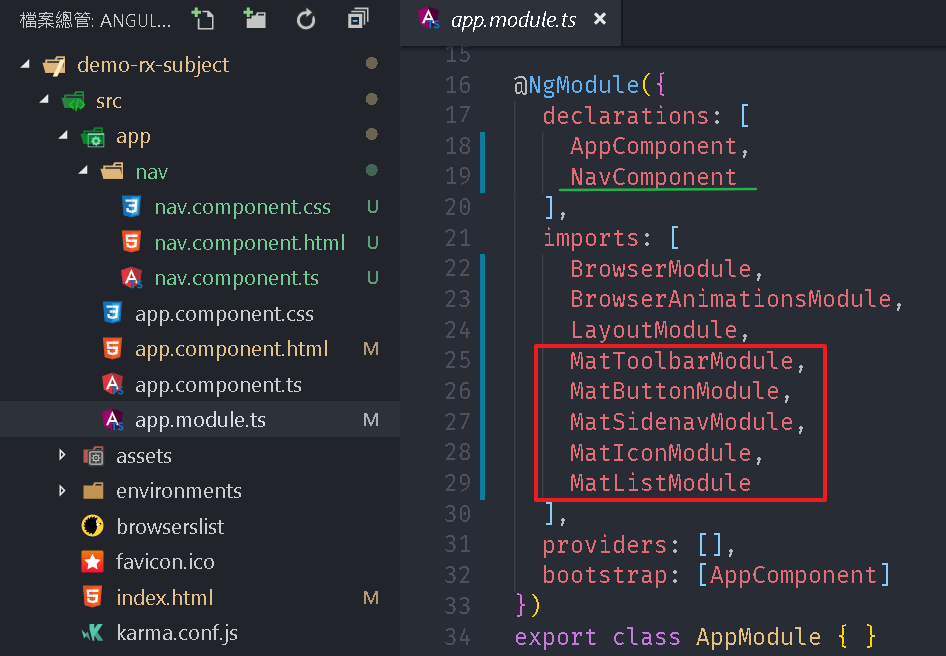
正常情況下,我們使用 Angular Material 的 Component 時,須將其所屬的 NgModule 匯入到我們要使用的 Component - NavComponent 所屬的 NgModule - AppModule 內,這邊我們透過指令建立 material-nav 時已經同步幫我們加入會用到的 NgModule。
BehaviorSubject
接下來我們透過 BehaviorSubject 實作一個簡單的登入、登出功能,我們先建立一個 User 的 interface,新增一個檔案 src\app\modules\user.ts,內容如下:
1 | export interface User { |
接著我們透過指令 ng generate service globales 來建立一個 GlobalesService 的 service。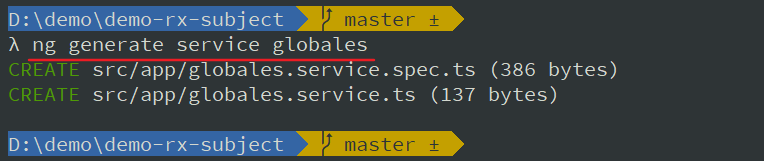
因為我們不談論測試,所以筆者會將副檔名為
.spec.ts的檔案都刪除。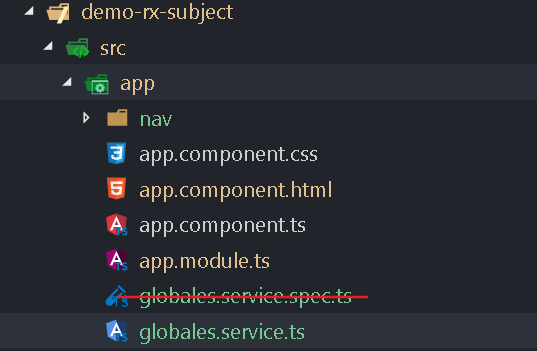
我們可以看到專案增加一個檔案 src\app\globales.service.ts,內容如下:
1 | import { Injectable } from '@angular/core'; |
在過去我們需要將 service 註冊到 NgModule 內的 providers 屬性才可使用,現在裝飾器 Injectable 增加了 providedIn 屬性,預設值為 root 表示該 service 會自動被註冊到根模組(AppModule)內,這應該算是單例模式的實作,讓整個專案共用同一個 service。
接著修改 GlobalesService,內容如下:
1 | import { Injectable } from '@angular/core'; |
先宣告一個 實作介面 User 的物件 guestUser 用來表示未登入的使用者。
接著宣告一個 BehaviorSubject - subUser$ 來記錄當前使用者的狀態,我們同時給予一個初始值 guestUser,表示預設未登入。
最後我們在 login、logout 方法內透過呼叫 next 來替換 subUser$ 當前的狀態,後續主要以 isLogin 來判斷是否登入。
不論式 Observable 或是 Subject 都是透過
next、error、complete方法來改變狀態,當呼叫同時就會去通知透過 subscribe 來訂閱的觀察者(Observer)。
BehaviorSubject 特別的地方在於只要一訂閱就會馬上收到通知,以及我們不一定要訂閱,只要透過 BehaviorSubject 的value屬性可以取得最後的值,透過getValue()方法就可以取得目前的狀態,getValue() 有可能會拋出異常。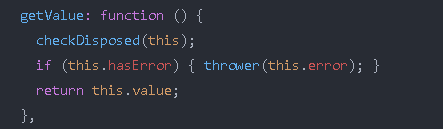
登入、登出
接著透過指令 ng generate component toolbar 來建立一個 ToolbarComponent,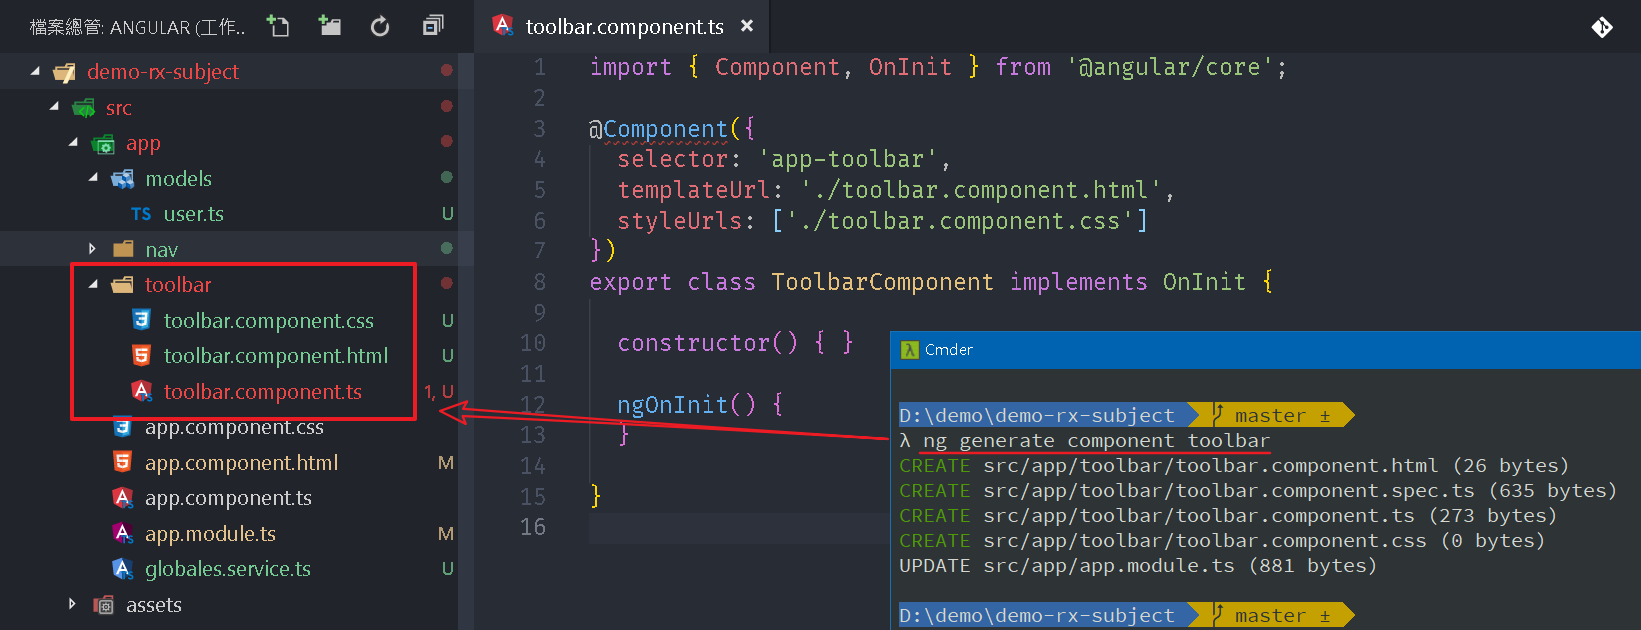
接著修改 src\app\toolbar\toolbar.component.ts,內容如下:
1 | import { Component, OnInit, OnDestroy } from '@angular/core'; |
先宣告一個 user 屬性來存放使用者的狀態。
接著在建構是透過 DI 注入來加入 GlobalesService,在 ngOnInit 方法(Angular 在建立此 Component 時會呼叫)內去訂閱 GlobalesService,並在收到 next 通知時將新的狀態寫入到 user,因為 BehaviorSubject 在訂閱同時就會馬上收到一次通知,所以我們不需要特別給 user 初始值。
接著在宣告一個 Subscription 來銜接 subscribe 的回傳值,因為我們必須透過此物件的 unsubscribe 方法來取消訂閱,接著時做 OnDestroy 介面,增加 ngOnDestroy 方法,此方法會在 Angular 摧毀此 Component 之前觸發,所以我們在此方法內來取消訂閱。
最後增加 login、logout 方法來呼叫 GlobalesService 內的對應方法,這種寫法感覺起來有點像非同步模式,我們呼叫 login、logout 方法時不會直接取得回傳值,而是透過 subscribe 方法來告訴我們狀態改變了。
BehaviorSubject 只要呼叫
next、error、complete方法就會通知,它並不關心值的內容,所以值沒改變也會收到通知,這部分有需要我們要自己判斷,或是透過一些 Operators 來篩選通知。
接著修改 src\app\toolbar\toolbar.component.html,內容如下:
1 | <ng-container *ngIf="user.isLogin; else tempLogin"> |
我們在登出狀態下顯示登入者的 Email 與登出按鈕,相反的,在登出狀態下則顯示 Email、Password 輸入框與登出按鈕,當然按鈕的 click 事件就會呼叫對應的方法。
接著我們開啟 src\app\nav\nav.component.html,因為 mat-toolbar 內的 menu 按鈕有事件處理,不方便整個抽換掉,所以改將 NavComponent 插入在其中。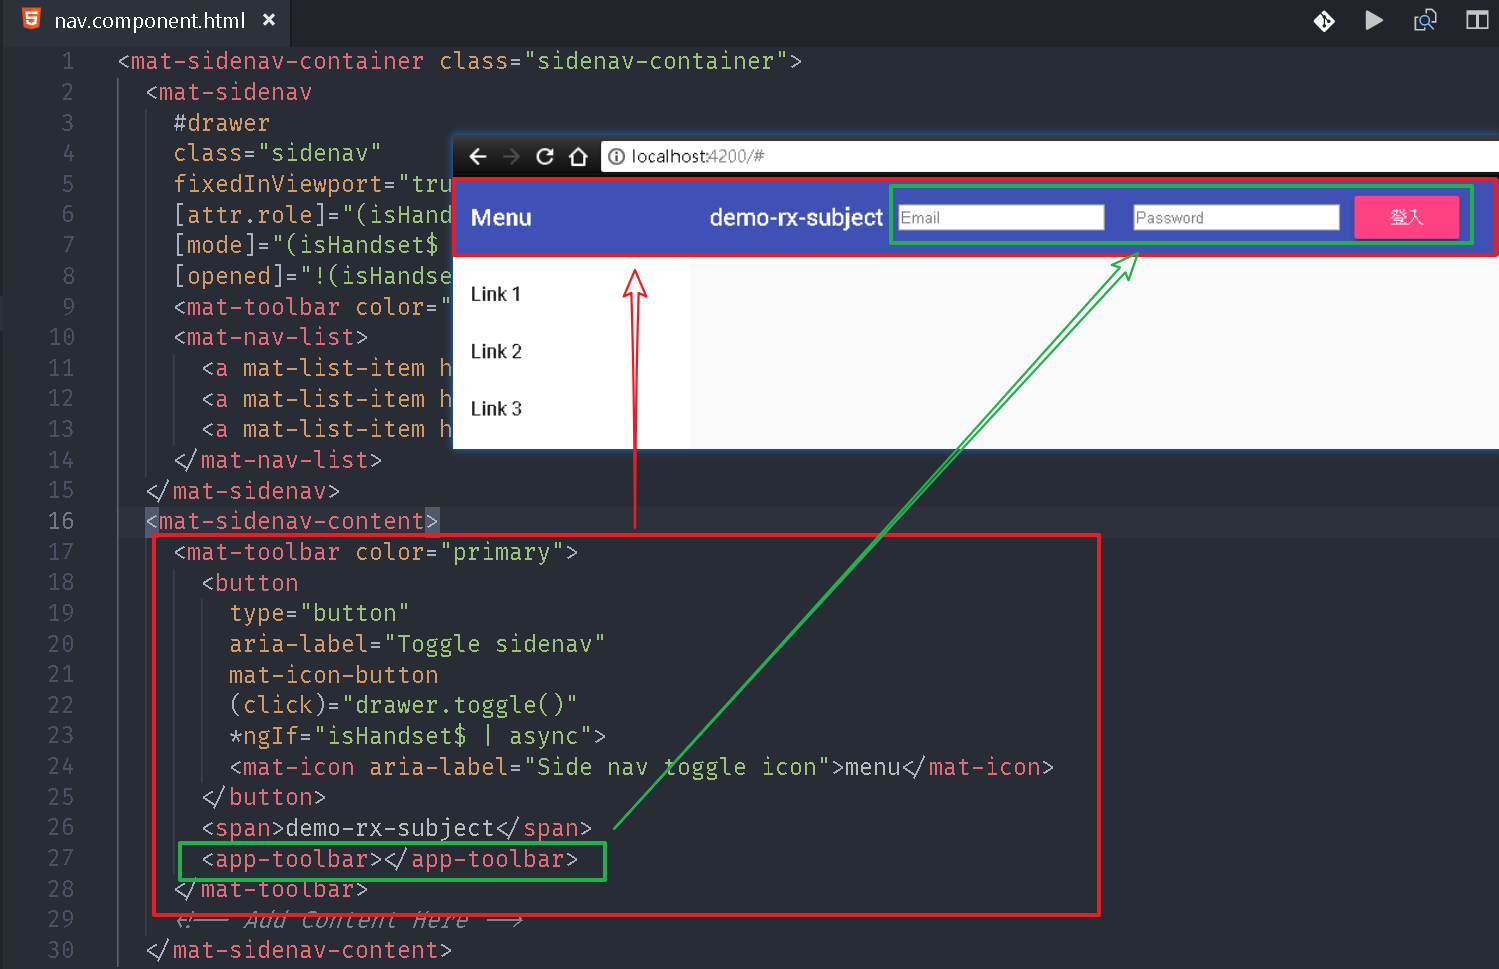
透過 ng serve 執行,便可呈現登入登出效果。
到目前為止感覺是多此一舉,繞了一大圈將簡單的事情搞複雜,接下來我們就開始發揮它的效益。
選單
我們透過指令 ng generate component menu-list 新增一個 MenuListComponent。
開啟 src\app\menu-list\menu-list.component.html,加入動態選單功能,修改內容如下:
1 | <mat-nav-list> |
接著修改 src\app\toolbar\menu-list.component.ts,內容如下:
1 | import { Component, OnInit, OnDestroy } from '@angular/core'; |
基本上與 ToolbarComponent 做法一樣,差別只是在 subscribe 裡面,當收到 next 通知時去呼叫 getMenu,此方法是模擬利用使用者的狀態來顯示可以操作的功能。
測試效果如下:
這種模式可以發現事情會變得很單純,ToolbarComponent 只處裡登入登出,不須理會登入登出會影響那些 Component,如果 Component 會需要因登入狀態不同而要調整時就自己訂閱 GlobalesService.subUser$ 就可以,當然對於 subUser$ 而言它也不會在意影響範圍,誰有訂閱它,它就通知誰,當然如果內容呈現效果差異很大時,我們可以建立不同的 Component,然後在收到通知時去切換 Component。
同場加映:RxDart
這幾天最近也在研究 Flutter,發現 Dart 版的 Rx - RxDart 與 RxJS 除了名詞上有些差異外用法完全一樣,利用 RxDart 可以做出同樣的登入登出效果。
我們在全域的類別宣告一個 BehaviorSubject,負責儲存 Login 狀態,這邊是透過 seedValue 屬性來設定初始值,RxJS 是呼叫 next 方法,這邊是使用 add 方法。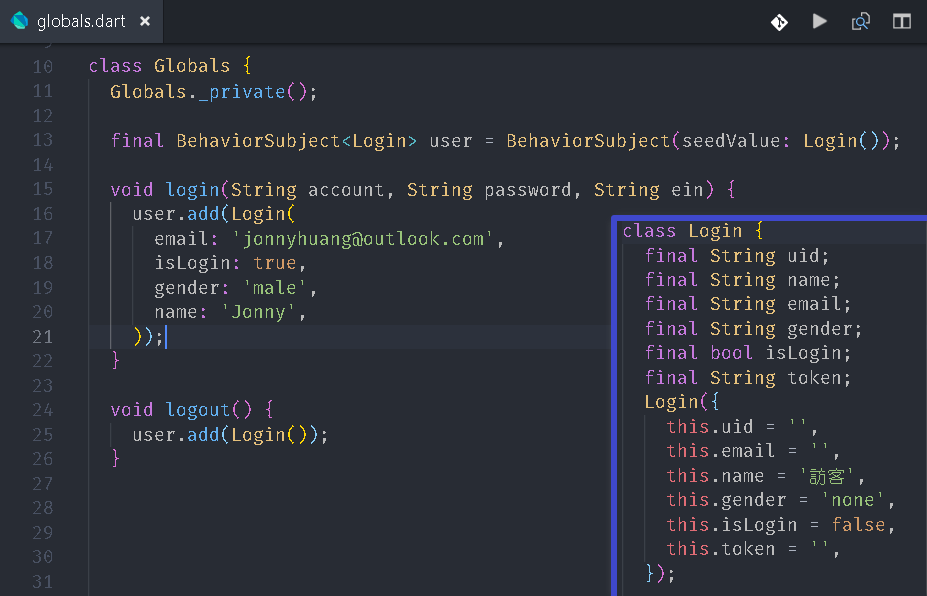
在 Flutter 的 UI 是由 Widget 組合而成,與 Angular 的 Component 概念一樣,我們一樣在元件建構時去訂閱,這邊訂閱的方法是 listen,會回傳 StreamSubscription 物件,一樣是透過此物件來取消訂閱,這邊取消訂閱的方法叫 cancel。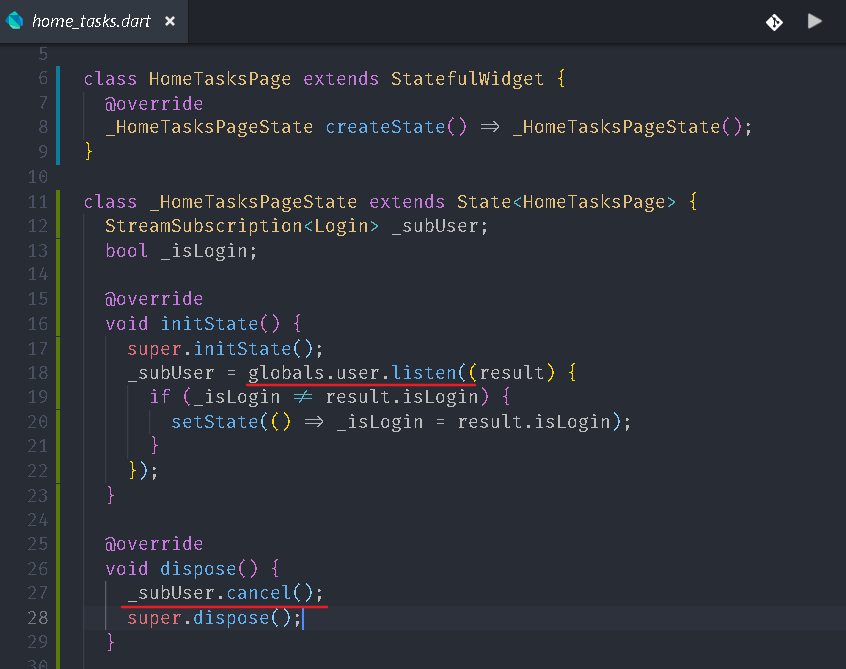
所以只要你弄懂 RxJS 的概念,很多地方都可以使用。