子路由 (Child Routing) 在 Angular UI:Angular Flex-Layout 我們透過 ng g m home --routing 建立 HomeModule ,因為多加了 --routing 參數,所以 CLI 多幫我們建立一個路由模組 home-routing.module.ts。
home-routing.module.ts 1 2 3 4 5 6 7 8 9 10 11 import { NgModule } from '@angular/core' ;import { Routes, RouterModule } from '@angular/router' ;const routes: Routes = [];@NgModule ({ imports : [RouterModule.forChild(routes)], exports : [RouterModule] }) export class HomeRoutingModule
比較一下 arc\app\app-routing.module.ts。
app-routing.module.ts 1 2 3 4 5 6 7 8 9 10 11 12 13 14 15 16 17 18 19 20 21 22 23 24 25 26 import { NgModule } from '@angular/core' ;import { Routes, RouterModule } from '@angular/router' ;import { Page1Component } from './page1/page1.component' ;import { Page2Component } from './page2.component' ;import { Page3Component } from './page3.component' ;import { Page404Component } from './page404/page404.component' ;import { Opt1Component } from './operation/opt1/opt1.component' ;import { HomeComponent } from './home/home.component' ;const routes: Routes = [ { path : '' , redirectTo : 'home' , pathMatch : 'full' }, { path : 'home' , component : HomeComponent }, { path : 'p1' , component : Page1Component }, { path : 'p2' , component : Page2Component }, { path : 'p3' , component : Page3Component }, { path : 'opt1' , component : Opt1Component }, { path : '404' , component : Page404Component }, { path : '**' , redirectTo : '404' } ]; @NgModule ({ imports : [RouterModule.forRoot(routes)], exports : [RouterModule] }) export class AppRoutingModule
可以發現 AppRoutingModule 是透過 RouterModule.forRoot(routes) 匯入,而 HomeRoutingModule 是透過 RouterModule.forChild(routes) 匯入,Angular 在執行時只有一個根路由當作起點,相關其他路由會子路由的身分以附加到根路由內。HomeRoutingModule 因為先被匯入到 HomeModule ,而 HomeModule 又被匯入到 AppModule ,所以 HomeRoutingModule 的路由規則才會被偵測到。
嘗試把 AppModule 內的路由規則 { path: 'home', component: HomeComponent } 移至 HomeRoutingModule ,並取消萬用路由規則。
app-routing.module.ts 1 2 3 4 5 6 7 8 9 10 11 12 13 14 15 16 17 18 19 20 21 22 23 24 25 26 import { NgModule } from '@angular/core' ;import { Routes, RouterModule } from '@angular/router' ;import { Page1Component } from './page1/page1.component' ;import { Page2Component } from './page2.component' ;import { Page3Component } from './page3.component' ;import { Page404Component } from './page404/page404.component' ;import { Opt1Component } from './operation/opt1/opt1.component' ;const routes: Routes = [ { path : '' , redirectTo : 'home' , pathMatch : 'full' }, { path : 'p1' , component : Page1Component }, { path : 'p2' , component : Page2Component }, { path : 'p3' , component : Page3Component }, { path : 'opt1' , component : Opt1Component }, { path : '404' , component : Page404Component }, ]; @NgModule ({ imports : [RouterModule.forRoot(routes)], exports : [RouterModule] }) export class AppRoutingModule
home-routing.module.ts 1 2 3 4 5 6 7 8 9 10 11 12 13 14 import { NgModule } from '@angular/core' ;import { Routes, RouterModule } from '@angular/router' ;import { HomeComponent } from './home.component' ;const routes: Routes = [ { path : 'home' , component : HomeComponent } ]; @NgModule ({ imports : [RouterModule.forChild(routes)], exports : [RouterModule] }) export class HomeRoutingModule
執行後會看到結果沒有任何該便,這意味的 Angular 會幫我們將所有路由合併,並依序比對路由規則,所以也表示子路由加入的順序也會影響比對結果,只是正常情況下路由規格的條件(path 屬性)不應該重複。
因為目前的路由模組是透過 Angular 幫我們整合,正常情況下它會以根路由為主,在依子路由模組加入的順序依次加進去,所以如果根路由包含了萬用路由的規則,那路由規則比對時可能就會在此就被攔截,後續路由規則可能就會不再比對。
先在 Aside 區塊加入一些功能項目,因為會使用到 MdListModule MdButtonModule MdIconModule src\app\custom-material.module.ts 將缺少的模組補上。
custom-material.module.ts 1 2 3 4 5 6 7 8 9 10 11 12 13 14 15 16 17 18 19 20 21 22 23 24 import { NgModule } from '@angular/core' ;import { FlexLayoutModule } from '@angular/flex-layout' ;import { MdIconModule, MdButtonModule, MdListModule } from '@angular/material' ; @NgModule ({ imports : [ FlexLayoutModule, MdIconModule, MdButtonModule, MdListModule ], exports : [ FlexLayoutModule, MdIconModule, MdButtonModule, MdListModule ] }) export class CustomMaterialModule
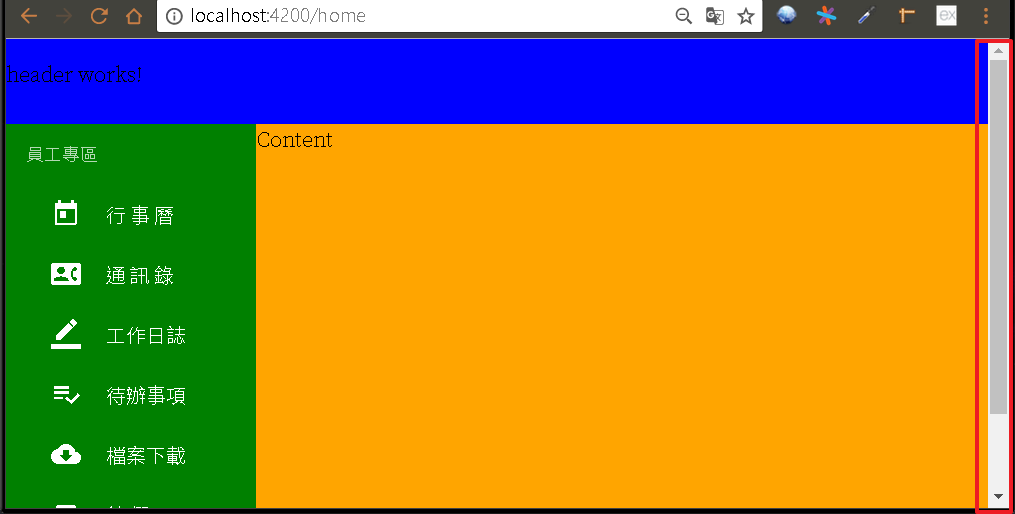
開啟 src\app\home\aside\aside.component.html 並加入下列功能清單。
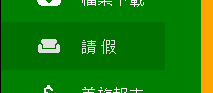
aside.component.html 1 2 3 4 5 6 7 8 9 10 11 12 13 14 15 16 17 18 19 20 21 22 23 24 25 26 27 28 29 30 31 32 33 34 35 36 37 38 39 40 41 42 43 44 45 46 <md-list > <h3 md-subheader > 員工專區</h3 > <button md-button routerLink ="" > <md-list-item > <md-icon md-list-icon > today</md-icon > <h4 md-line > 行 事 曆</h4 > </md-list-item > </button > <button md-button routerLink ="" > <md-list-item > <md-icon md-list-icon > contact_phone</md-icon > <h4 md-line > 通 訊 錄</h4 > </md-list-item > </button > <button md-button routerLink ="" > <md-list-item > <md-icon md-list-icon > border_color</md-icon > <h4 md-line > 工作日誌</h4 > </md-list-item > </button > <button md-button routerLink ="" > <md-list-item > <md-icon md-list-icon > playlist_add_check</md-icon > <h4 md-line > 待辦事項</h4 > </md-list-item > </button > <button md-button routerLink ="" > <md-list-item > <md-icon md-list-icon > cloud_download</md-icon > <h4 md-line > 檔案下載</h4 > </md-list-item > </button > <button md-button routerLink ="" > <md-list-item > <md-icon md-list-icon > weekend</md-icon > <h4 md-line > 請 假</h4 > </md-list-item > </button > <button md-button routerLink ="" > <md-list-item > <md-icon md-list-icon > attach_money</md-icon > <h4 md-line > 差旅報支</h4 > </md-list-item > </button > </md-list >
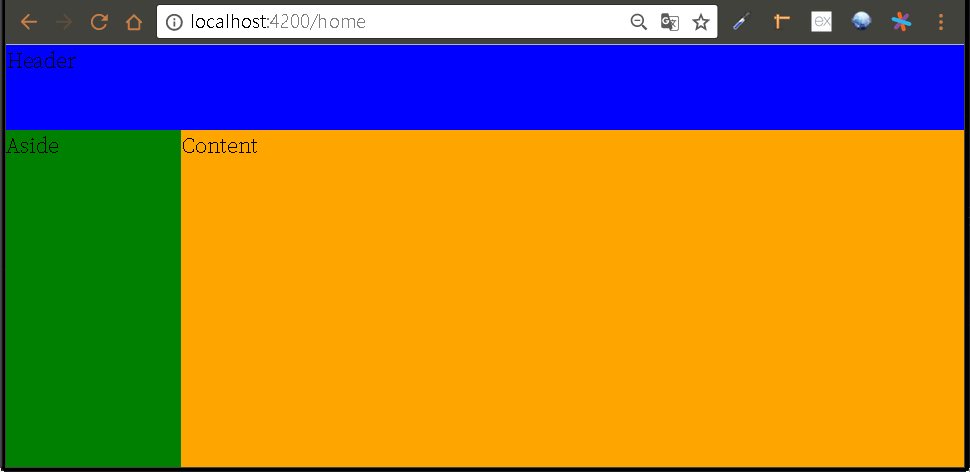
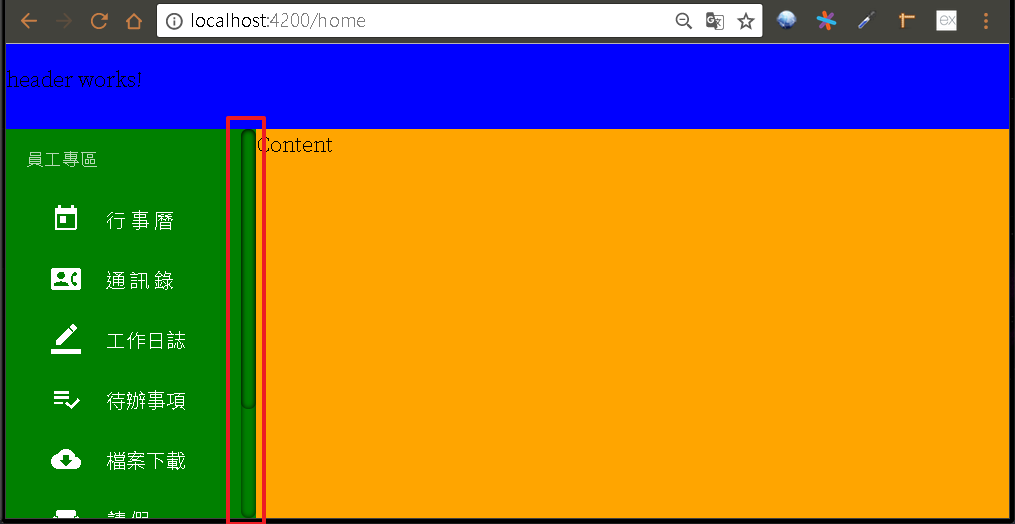
開啟瀏覽器查看結果。src\styles.scss,將 html、body加入隱藏滾動,並另外建立一個 scrollbar 的樣式,可以到 CodePen 搜尋範例 。
styles.scss 1 2 3 4 5 6 7 8 9 10 11 12 13 14 15 16 17 18 19 20 21 22 23 24 25 26 27 28 29 30 31 32 33 html ,body { height : 100% ; margin : 0px ; overflow-y : hidden; } .scrollbar { overflow-x : hidden; overflow-y : auto; padding-bottom : 48px ; } .scrollbar ::-webkit-scrollbar-track { -webkit-box-shadow: inset 0 0 6px rgba(0 , 0 , 0 , 0.8 ); border-radius : 10px ; background-color : transparent; } .scrollbar ::-webkit-scrollbar { width: 12px ; background-color : transparent; } .scrollbar ::-webkit-scrollbar-thumb { border-radius: 10px ; -webkit-box-shadow : inset 0 0 6px rgba(0 , 0 , 0 , 0.8 ); background-color : transparent; } @import "~@angular/material/prebuilt-themes/pink-bluegrey.css" ;
開啟 src\app\home\home.component.html,在 Aside 區塊所屬的 div 加入 scrollbar 樣式。
home.component.html 1 2 3 4 5 6 7 8 9 10 11 12 <div fxFill fxLayout ="column" class ="layout" > <div fxFlex ="68px" class ="header" > <app-header > </app-header > </div > <div fxFlex fxLayout ="row" class ="main" > <div fxFlex ="200px" class ="aside scrollbar" > <app-aside > </app-aside > </div > <div fxFlex class ="content" > Content</div > </div > </div >
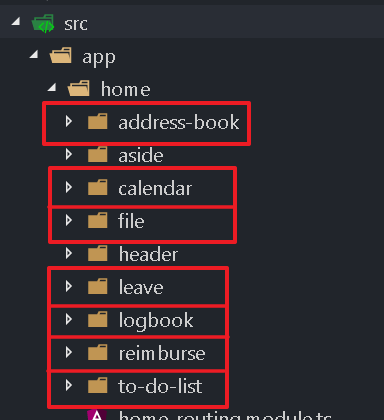
HomeModule 樣板會被保留下來,只有 Content 區塊需要切換。ng g c home\calendarng g c home\addressBookng g c home\logbookng g c home\toDoListng g c home\fileng g c home\leaveng g c home\eimbursesrc\app\home\home.component.html,在 Content 區塊內插入第二層的 router-outlet。
home.component.html 1 2 3 4 5 6 7 8 9 10 11 12 13 14 <div fxFill fxLayout ="column" class ="layout" > <div fxFlex ="68px" class ="header" > <app-header > </app-header > </div > <div fxFlex fxLayout ="row" class ="main" > <div fxFlex ="200px" class ="aside scrollbar" > <app-aside > </app-aside > </div > <div fxFlex class ="content" > <router-outlet > </router-outlet > </div > </div > </div >
開啟 src\app\home\home-routing.module.ts,依照剛所產生的元件建立對應的路由規則,比較不同的是這次的路由規則是建立在 home 這個路由規則的 children 屬性內。
home-routing.module.ts 1 2 3 4 5 6 7 8 9 10 11 12 13 14 15 16 17 18 19 20 21 22 23 24 25 26 27 28 29 30 31 import { NgModule } from '@angular/core' ;import { Routes, RouterModule } from '@angular/router' ;import { HomeComponent } from './home.component' ;import { CalendarComponent } from './calendar/calendar.component' ;import { AddressBookComponent } from './address-book/address-book.component' ;import { FileComponent } from './file/file.component' ;import { LeaveComponent } from './leave/leave.component' ;import { LogbookComponent } from './logbook/logbook.component' ;import { ReimburseComponent } from './reimburse/reimburse.component' ;import { ToDoListComponent } from './to-do-list/to-do-list.component' ;const routes: Routes = [ { path : 'home' , component : HomeComponent, children : [ { path : 'address-book' , component : AddressBookComponent }, { path : 'calendar' , component : CalendarComponent }, { path : 'file' , component : FileComponent }, { path : 'leave' , component : LeaveComponent }, { path : 'logbook' , component : LogbookComponent }, { path : 'reimburse' , component : ReimburseComponent }, { path : 'to-do-list' , component : ToDoListComponent }, ] } ]; @NgModule ({ imports : [RouterModule.forChild(routes)], exports : [RouterModule] }) export class HomeRoutingModule
符合現在所設的路由規則的導覽路徑前面必包含 home 路徑,因為必須先滿足 path:'home' 這條路由規則才有機會繼續比對 children 內的路由規則。children 內的路由規則也是可以再加上子路由規則(children),如此可以一層一層的延伸下去。
開啟 src\app\home\aside\aside.component.html 並在各功能選單加入 routerLink。
aside.component.html 1 2 3 4 5 6 7 8 9 10 11 12 13 14 15 16 17 18 19 20 21 22 23 24 25 26 27 28 29 30 31 32 33 34 35 36 37 38 39 40 41 42 43 44 45 46 <md-list > <h3 md-subheader > 員工專區</h3 > <button md-button routerLink ="./calendar" > <md-list-item > <md-icon md-list-icon > today</md-icon > <h4 md-line > 行 事 曆</h4 > </md-list-item > </button > <button md-button routerLink ="./address-book" > <md-list-item > <md-icon md-list-icon > contact_phone</md-icon > <h4 md-line > 通 訊 錄</h4 > </md-list-item > </button > <button md-button routerLink ="./logbook" > <md-list-item > <md-icon md-list-icon > border_color</md-icon > <h4 md-line > 工作日誌</h4 > </md-list-item > </button > <button md-button routerLink ="./to-do-list" > <md-list-item > <md-icon md-list-icon > playlist_add_check</md-icon > <h4 md-line > 待辦事項</h4 > </md-list-item > </button > <button md-button routerLink ="./file" > <md-list-item > <md-icon md-list-icon > cloud_download</md-icon > <h4 md-line > 檔案下載</h4 > </md-list-item > </button > <button md-button routerLink ="./leave" > <md-list-item > <md-icon md-list-icon > weekend</md-icon > <h4 md-line > 請 假</h4 > </md-list-item > </button > <button md-button routerLink ="./reimburse" > <md-list-item > <md-icon md-list-icon > attach_money</md-icon > <h4 md-line > 差旅報支</h4 > </md-list-item > </button > </md-list >
開啟瀏覽器查看結果,Content 區塊應該就能依所選的功能選單出現對應的元件。
home-routing.module.ts 1 2 3 4 5 6 7 8 9 10 11 12 13 14 15 16 17 18 19 20 21 22 23 24 25 26 27 28 29 30 31 32 import { NgModule } from '@angular/core' ;import { Routes, RouterModule } from '@angular/router' ;import { HomeComponent } from './home.component' ;import { CalendarComponent } from './calendar/calendar.component' ;import { AddressBookComponent } from './address-book/address-book.component' ;import { FileComponent } from './file/file.component' ;import { LeaveComponent } from './leave/leave.component' ;import { LogbookComponent } from './logbook/logbook.component' ;import { ReimburseComponent } from './reimburse/reimburse.component' ;import { ToDoListComponent } from './to-do-list/to-do-list.component' ;const routes: Routes = [ { path : 'home' , component : HomeComponent, children : [ { path : '' , redirectTo : 'to-do-list' , pathMatch : 'full' }, { path : 'address-book' , component : AddressBookComponent }, { path : 'calendar' , component : CalendarComponent }, { path : 'file' , component : FileComponent }, { path : 'leave' , component : LeaveComponent }, { path : 'logbook' , component : LogbookComponent }, { path : 'reimburse' , component : ReimburseComponent }, { path : 'to-do-list' , component : ToDoListComponent } ] } ]; @NgModule ({ imports : [RouterModule.forChild(routes)], exports : [RouterModule] }) export class HomeRoutingModule
重新執行應該可以發現預設會被導引到 \home\to-do-list\。請假 功能選單的選取效果明顯寬度比較窄,所以可以直接修改 src\app\home\aside\aside.component.scss,將寬度放大。
aside.component.scss 1 2 3 4 button { width : 200px ; }
Angular 的 Component 除了會幫我們把 JavaScript 隔離好避免元件之間互相汙染外,每個元件也可以透過獨立的樣式檔各式調整,但是要注意 CSS 的特性,如果元件內還有其他元件也會同時受影響,比較好的做法是透過 CSS class 來套版。
[**first-app_2017-09-03.zip**](/uploads/first-app_2017-09-03.zip)