服務(Service) 隨著功能的增加邏輯也會相對越來越複雜,上帝對象 (God object )就會油然而生,維護性也會越來越困難,所以程式碼(TypeScript)以及樣板(HTML)的切割工作就會變得很重要,對於程式碼來說最常見的方式就是將資料邏輯與介面操作給分割開來。
Angular 提供了一個可重複使用程式代碼的機制-服務 (Service ),Service 類別內所宣告的 屬性 與 方法 可以讓不同類別使用,建立指令如下:ng generate service [name]
generate:可以縮寫成 g。service:可以縮寫成 s。--flat:參數可以使 CLI 不要建立資料夾。官網文件
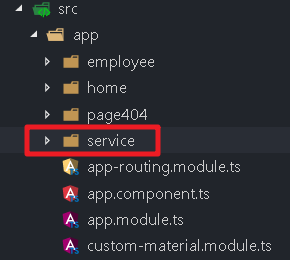
首先我們在 src\app\ 路徑下建立一個 service 資料夾。CalendarService :ng g s service\calendar --flatsrc\app\service\calendar.service.ts,可以發現這個類別加入了一個 @Injectable() 裝飾器。
calendar.service.ts 1 2 3 4 5 6 7 8 9 import { Injectable } from '@angular/core' ;@Injectable ()export class CalendarService constructor ( }
接下來將 CalendarService 註冊到 NgModule 內,我們可以假想每次註冊都會產生一個實體,如果將服務註冊到多個模組內,這不僅會浪費更多記憶體,如果服務本身會暫存資料,當不同元件對應的到不同服務實體時,元件對服務所做的資料異動都會造成資料不同步的問題,這邊我們直接註冊在起始模組-AppModule 內。
註冊 Component 時是加到 @NgModule 的 declarations 屬性。Module 時是加到 @NgModule 的 imports 屬性。Service 時是加到 @NgModule 的 providers 屬性或者是 @Component 的 providers 屬性。
編輯 src\app\app.module.ts。
app.module.ts 1 2 3 4 5 6 7 8 9 10 11 12 13 14 15 16 import { BrowserAnimationsModule } from '@angular/platform-browser/animations' ;... import { CalendarService } from './service/calendar.service' ;@NgModule ({ declarations : [ ... ], imports : [ ... ], providers : [CalendarService], bootstrap : [AppComponent] }) export class AppModule
服務 也可以註冊到 元件 內,只是這時就代表這個實體被該元件所獨佔,一般來說除非是該服務確實只給特定元件使用否則建議都註冊到模組內,接下來我們會透過依賴注入 (DI = Dependency Injection )來存取服務,存取方式也很簡單,只要在建構函式加入所需服務類別的參數即可。src\app\employee\calendar\calendar.component.ts,在建構式內加上 _calendarService 參數,並宣告一個全域變數 calendarService 來承接。
calendar.component.ts 1 2 3 4 5 6 7 8 9 10 11 12 13 14 15 16 17 import { Component, OnInit } from '@angular/core' ;import { CalendarService } from '../../service/calendar.service' ;@Component ({ selector : 'emp-calendar' , templateUrl : './calendar.component.html' , styleUrls : ['./calendar.component.scss' ] }) export class CalendarComponent implements OnInit ... private calendarService: CalendarService; constructor (_calendarService: CalendarService ) this .calendarService = _calendarService; } ... }
如果 calendarService 存取修飾詞改為 public 時,則元件樣板(calendar.component.html)也可以引用該變數。
TypeScript 提供一個更簡潔的語法糖,直接在建構式參數前加入存取修飾詞,TypeScript 會自動幫我們建立一個同名的全域變數,因此我們修改如下:
calendar.component.ts 1 2 3 4 5 6 7 8 9 10 11 12 13 14 import { Component, OnInit } from '@angular/core' ;import { CalendarService } from '../../service/calendar.service' ;@Component ({ selector : 'emp-calendar' , templateUrl : './calendar.component.html' , styleUrls : ['./calendar.component.scss' ] }) export class CalendarComponent implements OnInit ... constructor (private calendarService: CalendarService ... }
接下來我們將 CalendarComponent 的程式碼複製到 src\app\service\calendar.service.ts。
calendar.service.ts 1 2 3 4 5 6 7 8 9 10 11 12 13 14 15 16 17 18 19 20 21 22 23 24 25 26 27 28 29 30 31 32 33 34 35 36 37 38 39 40 41 42 43 44 45 46 47 48 49 50 51 52 53 54 55 56 57 58 59 60 61 62 63 64 65 66 67 68 69 70 71 72 73 74 75 76 77 78 79 80 81 82 83 84 85 86 87 88 89 90 91 92 93 94 95 96 import { Injectable } from '@angular/core' ;@Injectable ()export class CalendarService selectedDay : Date ; selectedMonth = '' ; dayHeaders = ['日' , '一' , '二' , '三' , '四' , '五' , '六' ]; dayColors = ['red' , 'white' , 'white' , 'white' , 'white' , 'white' , 'green' ]; days = []; lastMonth_colspan = 0 ; selectedItem: any ; constructor ( getToday ( this .selectedDay = new Date (); this .getDay(); } getDay (addDMonth: number = 0 ) let year = this .selectedDay.getFullYear(); let month = this .selectedDay.getMonth() + addDMonth; const dt = new Date (year, month, 1 ); year = dt.getFullYear(); month = dt.getMonth(); const maxDay = new Date (year, month + 1 , 0 ).getDate(); const newDay = this .selectedDay.getDate(); this .selectedDay = new Date (year, month, (newDay < maxDay) ? newDay : maxDay); const dayNumber = this .selectedDay.getDate(); this .lastMonth_colspan = new Date (year, month, 1 ).getDay(); const _days = []; for (let day = 1 ; day <= 31 ; day++) { const time = new Date (year, month, day); if (time.getMonth() > month) { break ; } const isSelected = time.getDate() === dayNumber; const d: any = { isSelected : isSelected, datetime : time, day : day, week : time.getDay() }; if (isSelected) { this .selectedItem = d; } _days.push(d); } this .days = [..._days]; month++; if (month === 13 ) { month = 1 ; year++; } this .selectedMonth = `${year} 年 ${month} 月` ; this .getNote(); } selectdDay (item: any ) if (this .selectedItem) { this .selectedItem.isSelected = false ; } item.isSelected = true ; this .selectedItem = item; this .selectedDay = item.datetime; } getNote ( if (this .days.length > 0 ) { const d = Math .floor(Math .random() * 28 ); this .days.forEach(item => const notes = []; if (item.week !== 0 && item.week !== 6 ) { if (item.week === 1 ) { notes.push({ type : 1 , subject : '8:00 每周會議' }); } let b = Math .random() >= 0.5 ; if (b) { notes.push({ type : 2 , subject : 'XXX客戶拜訪' }); } b = Math .random() >= 0.5 ; if (b) { notes.push({ type : 3 , subject : '專案討論' }); } if (item.day === d) { notes.push({ type : 4 , subject : '部門聚餐' }); } } item.notes = notes; }); } } }
修改 calendar.component.ts,將方法內的邏輯都清空改呼叫 CalendarService 所對應的同名方法,並將 calendarService 存取修飾詞改成 public,以便將樣板(calendar.component.html)的資料來源都指向到 CalendarService 。
calendar.component.ts 1 2 3 4 5 6 7 8 9 10 11 12 13 14 15 16 17 18 19 20 21 22 23 24 25 26 27 28 29 import { Component, OnInit } from '@angular/core' ;import { CalendarService } from '../../service/calendar.service' ;@Component ({ selector : 'emp-calendar' , templateUrl : './calendar.component.html' , styleUrls : ['./calendar.component.scss' ] }) export class CalendarComponent implements OnInit constructor (public calendarService: CalendarService ngOnInit ( this .getToday(); } getToday ( this .calendarService.getToday(); } getDay (addDMonth: number = 0 ) this .calendarService.getDay(addDMonth); } selectdDay (item: any ) this .calendarService.selectdDay(item); } }
calendar.component.html 1 2 3 4 5 6 7 8 9 10 11 12 13 14 15 16 17 18 19 20 21 22 23 24 25 26 27 28 29 30 31 32 33 34 35 36 37 38 39 40 41 42 43 44 45 46 47 48 49 50 51 52 53 54 <div fxLayout ="row" fxLayout.xs ="column" > <div fxFlex ="70" fxFlex.xs > <md-card > <md-card-header > <md-card-title > 行事曆</md-card-title > <md-card-subtitle > <h1 > { {calendarService.selectedMonth} }</h1 > </md-card-subtitle > </md-card-header > <md-card-content > <md-grid-list cols ="7" rowHeight ="68px" > <md-grid-tile *ngFor ="let header of calendarService.dayHeaders; let i = index" [ngStyle ]="{'color': calendarService.dayColors[i]}" > <h3 > { {header} }</h3 > </md-grid-tile > <md-grid-tile [colspan ]="calendarService.lastMonth_colspan" *ngIf ="calendarService.lastMonth_colspan" > </md-grid-tile > <md-grid-tile *ngFor ="let item of calendarService.days" [ngStyle ]="{'color': calendarService.dayColors[item.week]}" class ="day" (click )="selectdDay(item)" > <div fxFill *ngIf ="item.isSelected" class ="selected" > </div > <span class ="text" > { {item.day} }</span > <div fxFill fxLayout ="row" fxLayoutAlign ="start end" class ="note" > <ng-container *ngFor ="let note of item.notes" > <ng-container [ngSwitch ]="note.type" > <md-icon *ngSwitchCase ="1" > assessment</md-icon > <md-icon *ngSwitchCase ="2" > directions_run</md-icon > <md-icon *ngSwitchCase ="3" > forum</md-icon > <md-icon *ngSwitchCase ="4" > local_dining</md-icon > <md-icon *ngSwitchDefault ="" > alarm</md-icon > </ng-container > </ng-container > </div > </md-grid-tile > </md-grid-list > </md-card-content > <md-card-actions > <button md-button (click )="getDay(-1)" > 上個月</button > <button md-button (click )="getToday()" > 本月</button > <button md-button (click )="getDay(1)" > 下個月</button > </md-card-actions > </md-card > </div > <div fxFlex > <md-card > <md-card-content > <h1 > { {calendarService.selectedDay | date:'yyyy/MM/dd'} }</h1 > <md-divider > </md-divider > <md-list > <md-list-item *ngFor ="let item of calendarService.selectedItem.notes; let i = index" > { {i+1} }. { {item.subject} } </md-list-item > </md-list > </md-card-content > </md-card > </div > </div >
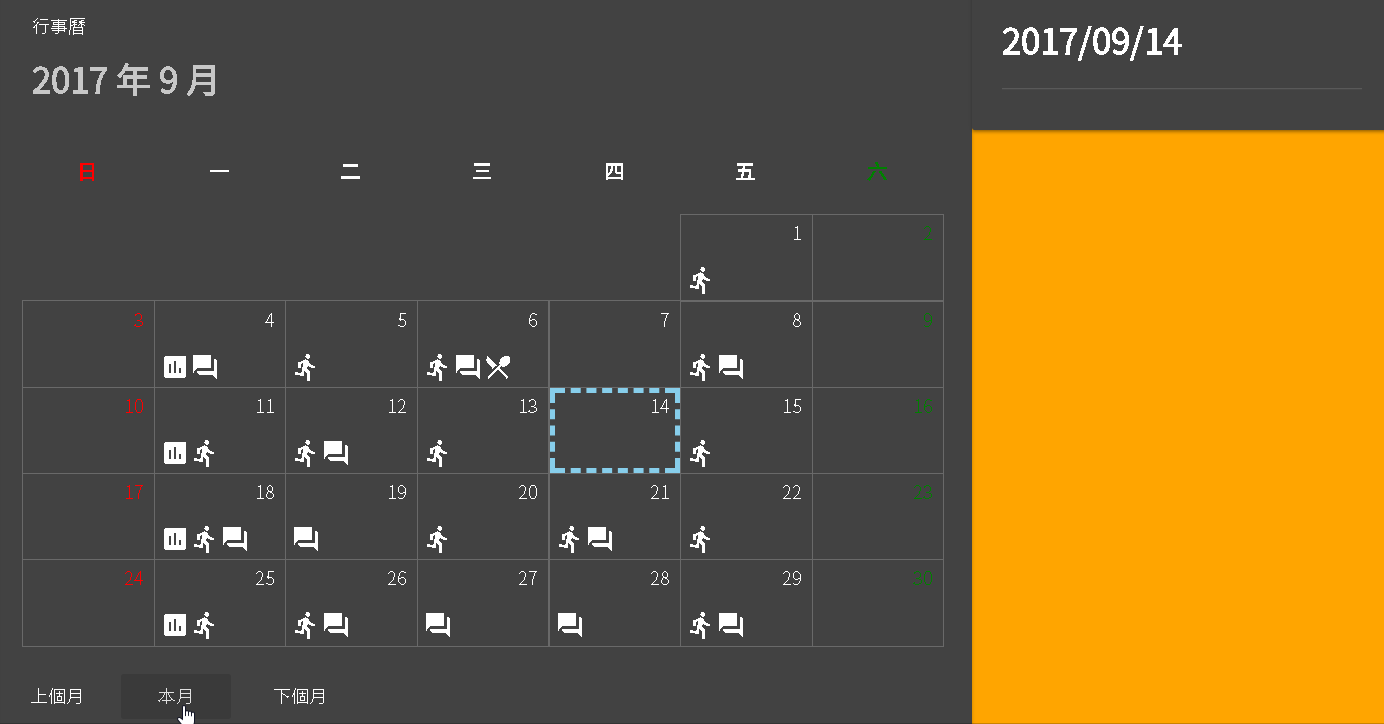
執行專案,從瀏覽器查看沒有任何改變,但是我們可以看到 calendar.component.ts 變得非常乾淨,沒幾行程式碼。
上面程式移植方式其實不是很好,因為跟 CalendarComponent 樣板有關的邏輯與變數都被移並移植到 CalendarService ,這樣就會失去服務可共用的特性,在這邊主要是演繹如何簡化元件類別程式碼的複雜度。
[**first-app_2017-09-14.zip**](/uploads/first-app_2017-09-14.zip)